
Christmas Cards and How to Store Them! (Perfectly Plaid Bundle)
- pinehollowdesign
- Nov 25, 2019
- 3 min read

Ever make thirty cards in one weekend? Whether you've made swaps, prepped for a craft show, or just like to have a few duplicate cards on hand, I'm sure most of my fellow crafty friends can relate.
I made ten cards each of three designs to give as Christmas gifts ('ll go into detail on the cards in a later post), and then stared at my once-craft-desk that had become just a mess of cards, everywhere. I think one of my least favorite things about making duplicates is figuring out where to put them until they go on to their new home.
So, off to Pinterest I went, looking up "card boxes". Pinterest is full of creative people with great ideas. My project was based off of a creation by Teri Pocock, a UK demonstrator. You can view the pin here.
I had so much fun creating these card boxes that easily store ten 4 1/4" X 5 1/2" cards with decent embellishing, or many more if they're flat. The size of the box also perfectly fits envelopes.
The best part? One box is made from one regular piece of 8 1/2" x 11" piece of cardstock. To get started, score at 2" and 6 1/2" on the short side. Then, score at 5 3/4" and 7 3/4" on the long side. You'll cut on the line where the 2" score meets the 5 3/4" and 7 3/4" scores on both sides, then cut right next to it to create a little triangle, which will allow you to fold them as tabs. Check out the picture below to see these measurements in action.


Once everything is folded together (like the picture below), lightly place a mark where the side meets the front. There is a light pencil mark that I've pointed at below.

You'll do that on both sides, and then use a paper trimmer to cut a diagonal line from the dot to the top of the score line.

Once both sides are cut, fold the bottom tabs in (at the 4 1/2" x 3 1/2" area and the skinny section above) and add adhesive once they're folded in.

The skinny tabs will go on the inside, and you will fold the 4 1/2" x 3 1/3" section to meet it at a 90 degree angle.

Finally, fold up the longest side so it can adhere to the other side at a 90 degree angle. And that's all it takes to construct these card boxes!

For decoration, I decided to make them match the cards I made. For this particular white card box's decoration, I used the following supplies:
- Perfectly Plaid Bundle
- Wrapped in Plaid DSP (2 patterns, one small corner of each)
- Shaded Spruce Cardstock (4 3/8" x 3 1/8")
- Whisper White Cardstock (4 1/8 x 3" and a small scrap piece)
- Shaded Spruce Classic Stampin' Pad
- Red Rhinestones
- Gold Metallic Pearls
These are the two patterns I chose from the Wrapped in Plaid DSP pack:

I used the Pine Tree Punch on the bottom right of each piece of DSP to punch out one tree of each pattern.

Next, I used a scrap piece of Whisper White cardstock to stamp the plaid tree from the Perfectly Plaid stamp set in Shaded Spruce, then punched it out with the Pine Tree Punch.

To assemble, adhere the Shaded Spruce cardstock to the base, then the Whisper White cardstock on top of that. I then adhered the DSP trees, and used Stampin' Dimentionals on the stamped tree in the center. I added five red rhinestones on the center tree, and one gold metalic pearl on top of each tree.

Aaand you're done! You can decorate the front before or after assembling the box, but it's easier beforehand when it's still flat. Here's the box in action, with its matching card:

Supplies to make this box:
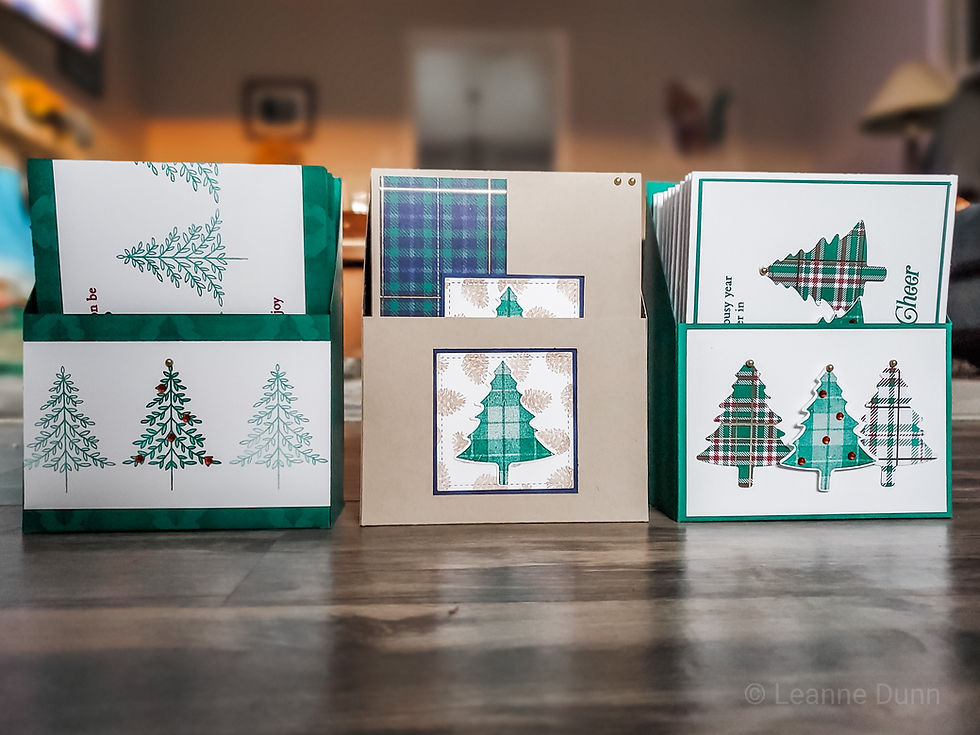
And here are a couple others I made!

Supplies to make this box:

Supplies to make this box:
I gave these to their intended home and they loved it! If you're looking for something you can create to give as a gift, these work great. For Christmas, maybe you'll want to make Valentine's Day cards with matching boxes, or birthday cards, or sympathy cards, or anything you think they could use. They are sure to love it and appreciate the effort you put into it!


Comments